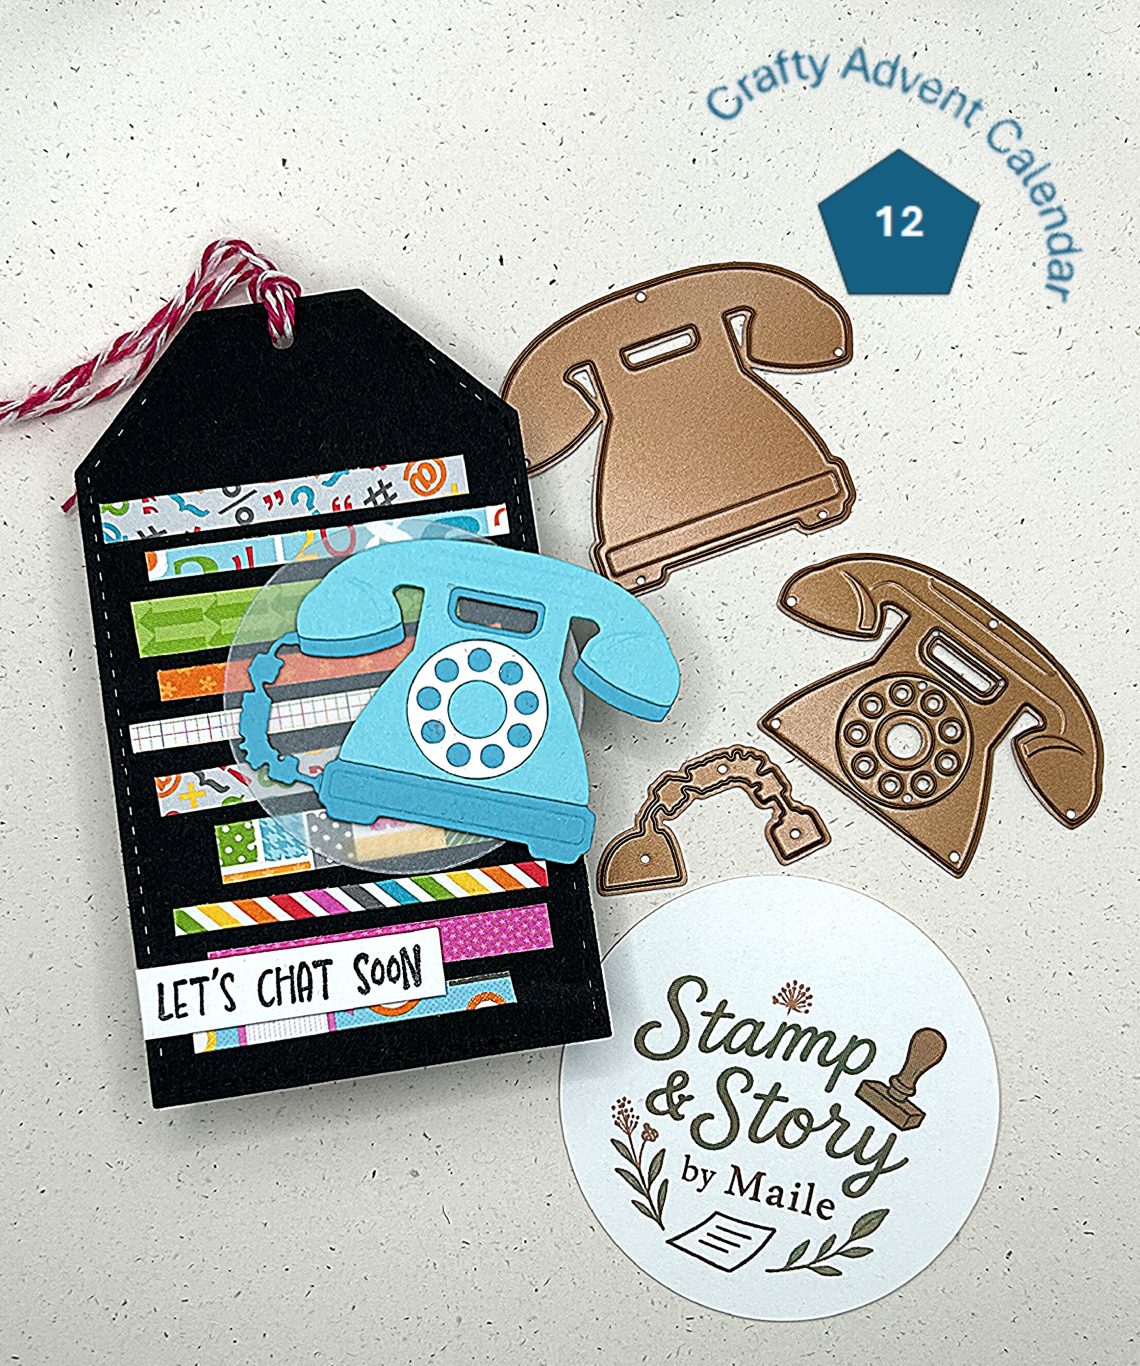
Day 12 –
I was thrilled with this die the minute I opened the door. I’ve had seen a few different patterned paper sets and coordinating sets that had a telephone, 80’s era, or office related, so I was very glad to see this die. I love the level of detail that Spellbinders puts into their dies, and this one is an excellent example.
Since there was a sentiment with Day 11 that fit perfectly, I built on top of that for this tag. I used strips of leftover printed paper for the background but the instructions start from scratch.

Tag Measurements – 2.5 x 4.25 inches
Assembly instructions –
- Die Cut tag from basic black heavy cardstock scrap.
- Cut 3/8 inch white cardstock strip for the sentiment.
- Die cut or punch a 2-inch circle from light vellum.
- Select 5 double sided patterned papers (or 10 single sided).
- From pattern 1 and 2, cut a single 1/8 inch strip. Cut 2, 2inch pieces from both.
- From pattern 3, cut a 1/4 inch strip. Cut 2, 2 inch pieces.
- From pattern 4 and 5, cut a 3/8 inch strip. Cut 2, 2 inch pieces from both. You should have 10, 2 inch piece strips.
- Die cut the telephone base and phone cord from dark turquoise (or a solid color that coordinates with selected patterned paper) cardstock scrap.
- Die cut the telephone detail from light turquoise (or a solid color that coordinates with selected pattered paper) and white cardstock scraps.
- Stamp sentiment from basic black ink on the 3/8 inch wide strip and trip to desired length.
- Assemble phone – Adhere the phone cable to the back of the phone base. Adhere the phone detail to the surface of the phone base. Adhere the white dial to the center of the detail, and the light turquoise center of the dial…. so cute!
- Assemble the tag – Select the sequence of the strips and adhere at different left/right positions so they don’t appear in a single column. Adhere the sentiment to the bottom of the tag, layered on top of the bottom two patterned strips. Adhere the phone to the vellum circle, off center to the right. Adhere the vellum circle to the tag, off center to the right so that the phone is hanging off and all the strips of pattern paper are visible. Apply glue behind the phone so it doesn’t show through the vellum.
- Add baker’s twine or ribbon.
Supplies –
- Spellbinders 2025 Crafty Advent Calendar
- Bazzill Cardstock
- Doodlebug Design Inc. 6×6 Take Note paper pad
- Stampin’ Up black ink pad
- Spellbinders Precision Glue