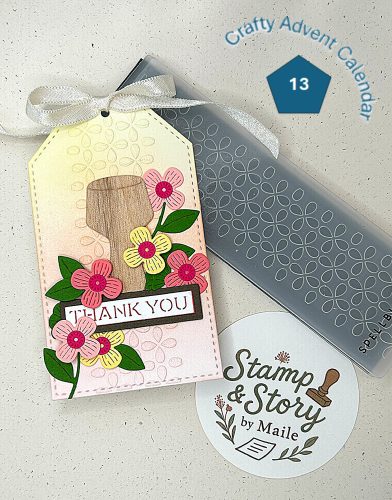
Day 13 –
Today we have our second mini embossing folder which measures about 2 x 6 inches. This pattern could be used as a floral or geometric background/border.
I selected to emboss the tag and layer on top of it. I selected dies from Day 4 and Day 5 to create the image.
I always have a tough time noodling on a creative presentation for the embossing folders to make them the focus of the design. While I’m not 100% pleased with this one, I do like the colors.
Tag Measurements – 2.5 x 4.25 inches
Assembly instructions –
- Die Cut the stitched die from white cardstock.
- Select a color palette and brush ink blend three colors on to the white cardstock tag.
- Dry emboss the tag, lining up the embossing folder down the middle of the tag.
- Die cut the stamp handle from day 4 from wood paper.
- Die cut the sentiment from day 4 from white cardstock scrap.
- Die cut the sentiment background from dark brown cardstock scrap.
- Trim a piece of bright pink cardstock to align with the sentiment.
- Assemble the stamp – Layer the white sentiment on the bright pink, so that the bright pink shows through but not around the sentiment layer. Adhere. Adhere the sentiment on the dark brown cardstock. Adhere the sentiment layer on the wood handle.
- Die cut small flowers from day 5 (6) from pale yellow, light coral, coral (colors to match ink blended background) cardstock scraps.
- Die cut flower centers (6) from bright pink (to match behind the sentiment) cardstock scrap.
- Die cut large stem (3) from medium bright green cardstock scrap.
- Assemble flowers – Cut off top of large stem (3) and set aside. Adhere centers to each flower. Adhere 1 flower to top of 1 large stem and cut off left leaf and set the leaf aside. For the 2nd stem, adhere one of the small flowers to the top, cut the right leaf and set aside the leaf for later. From the 3rd large stem, cut both leaves and set aside.
- Assemble tag – Adhere the stamp and sentiment to the center of the tag. Apply glue minimally to the center of the image so flowers can be layered. Layer some flowers under the stamp image. using foam tape layer some flowers over the stamp image. Add leaves and stem top to fill in space around flowers as desired.
- Add ribbon
Supplies –
- Spellbinders 2025 Crafty Advent Calendar
- Bazzill Cardstock
- Stampin’ Up wood paper
- Stampin’ Up White cardstock
- Pinkfresh ink cubes
- Spellbinders Precision Glue