Day 15 –
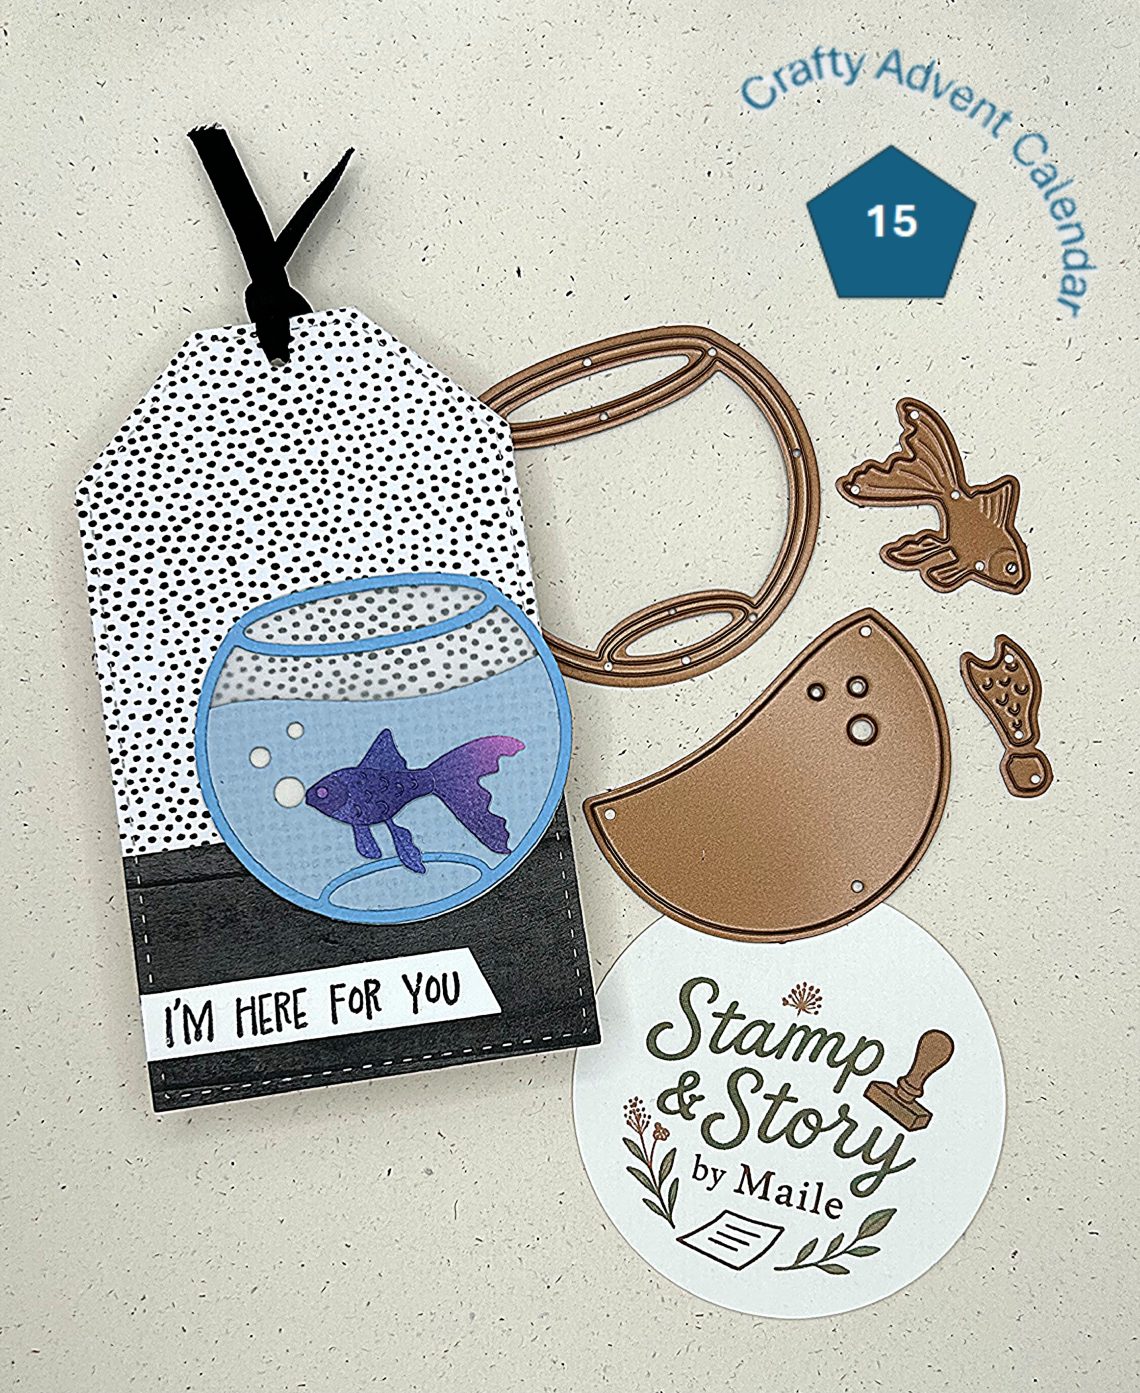
I am so excited to get a cute little fishbowl set…. I just love this little guy.
I had beta fish when I was growing up, a couple of them. I loved the bright blue/purple colors and wanted to create something like that with this little fishy.
I think the neutral background brings focus to this brightly colored fish on this tag.

Tag Measurements – 2.5 x 4.25 inches
Assembly instructions –
- Die cut stitched tag from white, black/white dots, and black wood patterned paper.
- Cut black wood patterned paper to 1 1/2 inch from bottom.
- Assemble the tag – Layer black/white dots on white tag and adhere. Adhere black wood patterned paper to the bottom of the tag.
- Die cut the fishbowl from med blue cardstock scrap paper.
- Die cut the water from a lighter blue cardstock scrap paper.
- Brush blend ink on a 3 x 3 inch white piece of cardstock, from which to cut the fish pieces. I tried to leave some true color spots like the pink, purple and blue, and blend the edges.
- Die cut fish pieces from inked cardstock.
- Assemble the fish – layer and adhere the scales to the surface of the fish base. Adhere the small piece behind the eye, try to pick a color that is brighter than the rest of the face.
- Adhere the bowl outline to a 3 x 3 vellum scrap. Wait for the glue to dry, then trim the vellum to the outside edge of the bowl.
- Adhere the water to the inside of the bowl.
- For my example, I wanted the fishbowl to stick out and added a layer of heavy cardstock behind the water. Hand trimmed and covering the bubbles, so they appear white.
- Assemble the fishbowl – Adhere the fish to the inside of the fishbowl so that the mouth is close to the bubbles.
- Attach the fishbowl to the tag, lightly off the right edge and sitting on the black wood patterned paper. My intention was to make it look like it was sitting on a table… not sure I fully achieved that look, however.
- Cut a 3/8 inch strip of white cardstock, stamp sentiment from day 11 in black ink and trim as desired.
- Adhere sentiment strip to the bottom left of the tag.
- Add ribbon.
Supplies –
- Spellbinders 2025 Crafty Advent Calendar
- Bazzill Cardstock
- Versafine black fine ink pad
- Pinkfresh Studio ink cubes
- Spellbinders Precision Glue