Day 19 –
Yea! More sentiments stamps today. Since most of these don’t seem to apply to dies that we have already opened, I am imagining the dies yet to come and how they relate to these sentiments.
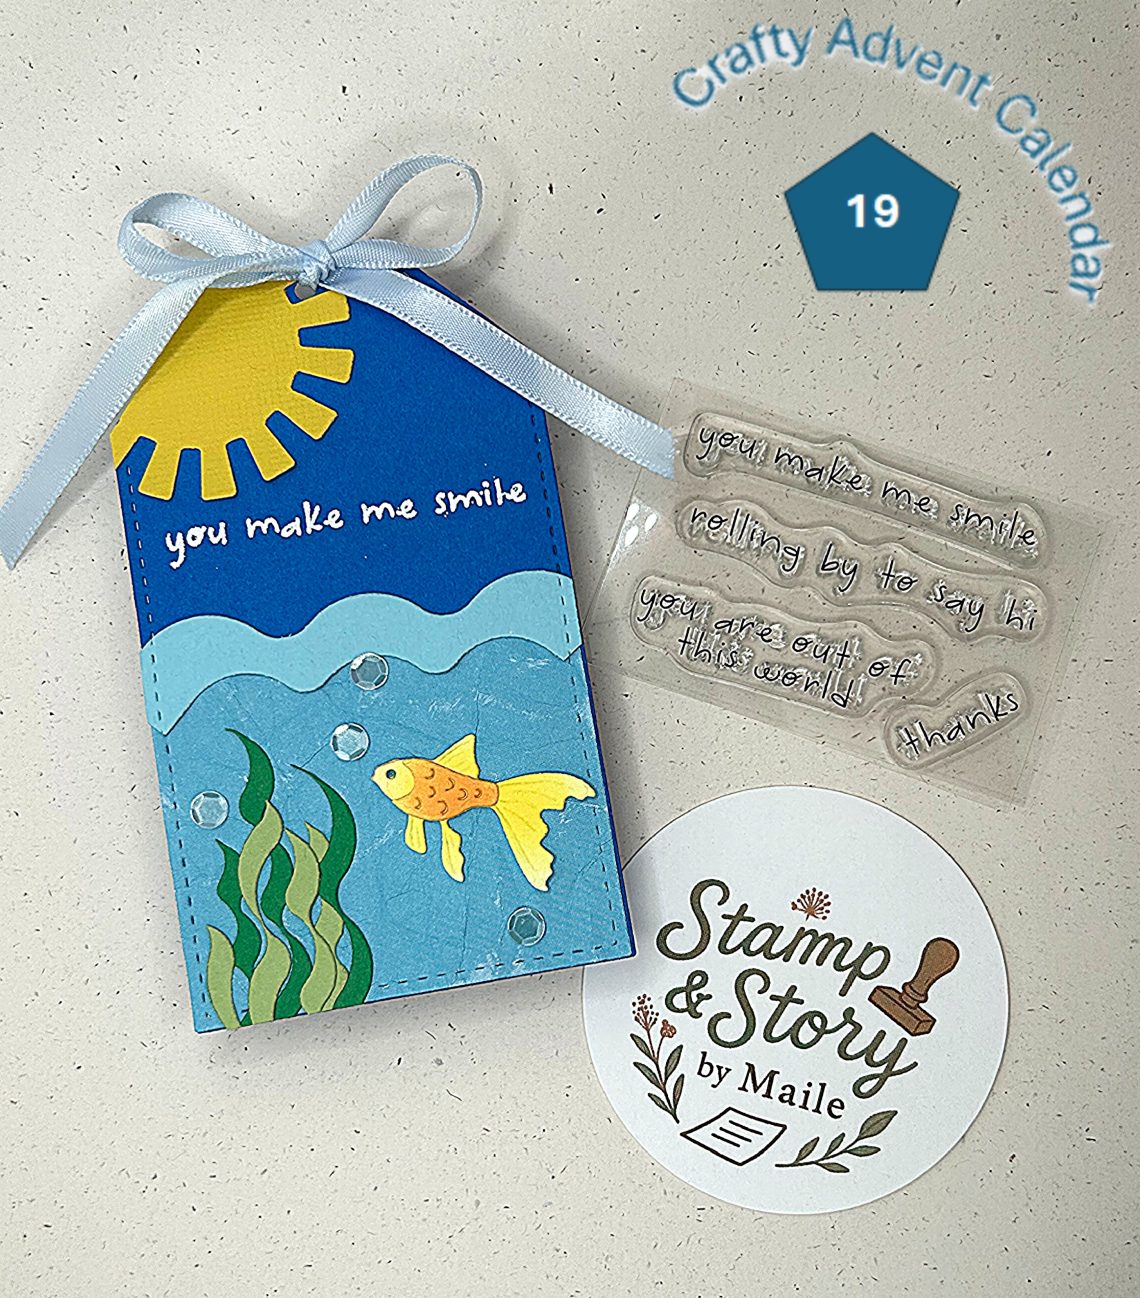
For the tag today, I went back to one of my favorites, the goldfish and bowl. Although, I didn’t use the fishbowl, I envisioned an open water fish.
To create the wave and the seaweed, I used the wavy corner die from yesterday, day 18. the goldfish is from day 15. The sequins came from day 17, and I borrowed the sunshine from my stash, created with a punch by EK Success.

Tag Measurements – 2.5 x 4.25 inches
Assembly instructions –
- Die cut the stitched tag from a bright medium blue cardstock scrap.
- Die cut the wavy corner from bright light blue cartstock scrap.
- Punch the sun from yellow cardstock scrap.
- Attach the sun to the top of the tag and trim the edge.
- Stamp the desired sentiment just under the sun with embossing ink, and heat emboss in white.
- Select a piece if medium blue, approximately 3 x 3 inches, and wad it up to crinkle the paper. Carefully open and then lightly brush white ink pad across to give the paper some texture.
- Die cut the bottom half of the stitched tag from the crinkled paper. Adhere to the tag.
- Adhere the blue wave to the top of the crinkle paper to create the water top.
- Ink blend a yellow/yellow orange/orange spot on white cardstock scrap, from which to die cut the goldfish.
- Die cut the goldfish base and scales from the ink blended scrap.
- Die cut the goldfish eye/face from blue.
- Assemble the fish – Adhere the blue scrap to the back side of the fish face (eye). Adhere the scales to the fish base.
- To create the seaweed, I selected two colors of green cardstock scrap (about 3 x 3 pieces). I cut one of the corner waves from each, but before taking the wave pieces off the die, used a piece of washi tape to keep them in place. I removed the die and them shifted the die away from the corner about a 1/8th inch and cut again. The result is several pieces of thin wavy paper pieces, of different lengths. I picked 3 or 4 of each color and attached to the bottom left of the tag to create a seaweed patch, underwater.
- Adhere the fish to the tag on the right bottom, in the water.
- Add sequins for bubbles as desired.
- Add ribbon.
Supplies –
- Spellbinders 2025 Crafty Advent Calendar
- EK Success Sun Punch
- Bazzill Cardstock
- Versamark watermark ink pad
- Hero Arts white embossing powder
- Spellbinders Precision Glue